How To Deploy Sample NodeJS Application With AWS Elastic Beanstalk
Get link
Facebook
X
Pinterest
Email
Other Apps
-
🤔What IsElasticBeanstalk?
AWS Elastic Beanstalk is a fully managed service that simplifies the deployment and management of applications in the AWS Cloud.
In simple way AWS Elastic Beanstalk is a powerful tool for deploying and managing web applications in the AWS Cloud.
🤑What Are Key Benefits Of Using Beanstalk?
Easy to Use: simply upload your application and Elastic Beanstalk automatically handles the provisioning, load balancing, scaling, and application health monitoring.
Support Multiple Languages: Elastic Beanstalk supports applications developed in Go, Java, .NET, Node.js, PHP, Python, and Ruby.
Customizable: You can change the configuration as needed.
Cost: There is no charge for using Elastic Beanstalk. You pay only for the AWS resources that your application is using.
🚀How To Deploy Application on Elastic Beanstalk?
First, it`s mandatory to have access to the AWS management console. If you have an AWS account so you are ready to start the journey of Elastic Beanstalk.
For a deep understanding follow this AWS official documentationhere📍The following steps will guide you through deploying a web application on AWS Elastic Beanstalk. Let`s Start……..
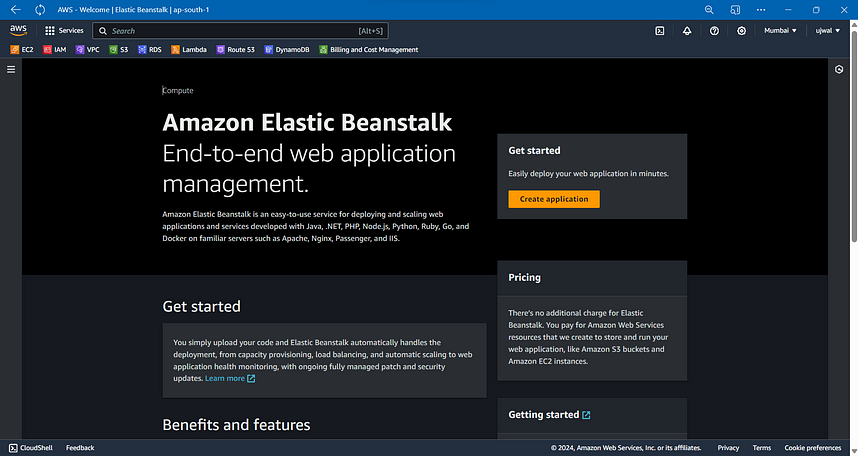
1. Open the Elastic Beanstalk Page
Go to AWS Console → Search for the Elastic Beanstalk → Click on Elastic Beanstalk from dropdown. Great!! Now you will see following page.
2. Create Environment and Deploy our Application
In this demo we will just choose mandatory options to setup an environment for Sample Nodejs Application.
If I sign on the box title with 🔴 that means the full box options, you could leave default. If I sign any option with 🟢means that option is mandatory or you must edit it according to your needs.
🟢Mandatory/ Edit it
🔴Leave Default
🟢We choseWeb Server Environmentbecause we are deploying sample web application of python. This option can be used for serving HTTP request for websites, web applications and web APIs
🟢Worker Applicationthis option can be used for creating separate worker environment tier.
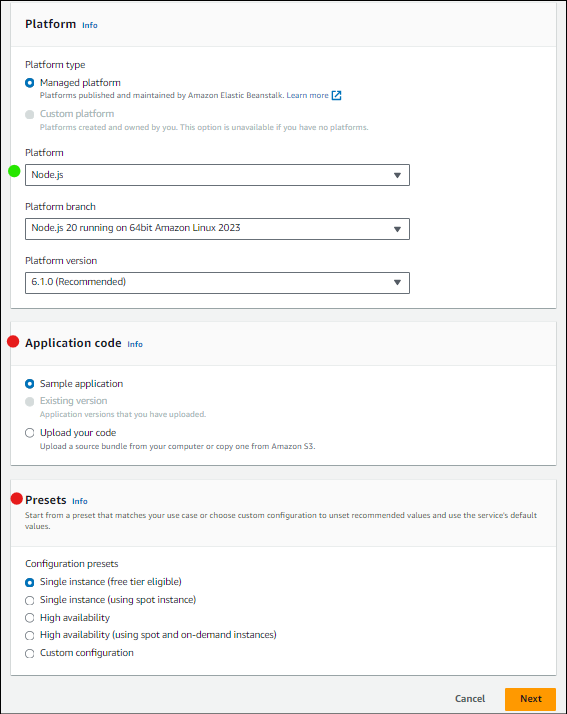
🟢Managed Platformmeans it will be maintained and managed by AWS Elastic Beanstalk automatically.
🟢Platformmeans in which programming language runtime environment we want to run our application. we can also choosePlatform version.
🔴Application Code:here we can upload our app code from local machine or can get from S3 bucket. we are usingsample appcode which will be managed AWS Elastic Beanstalk.
🔴Presets:here we can choose our instances with deferent configurations or can create our custom.
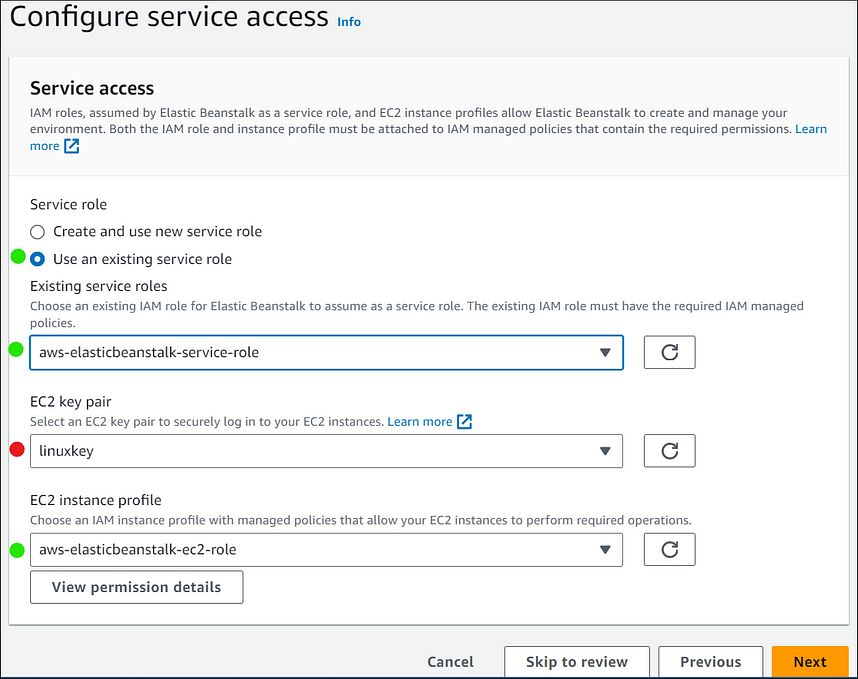
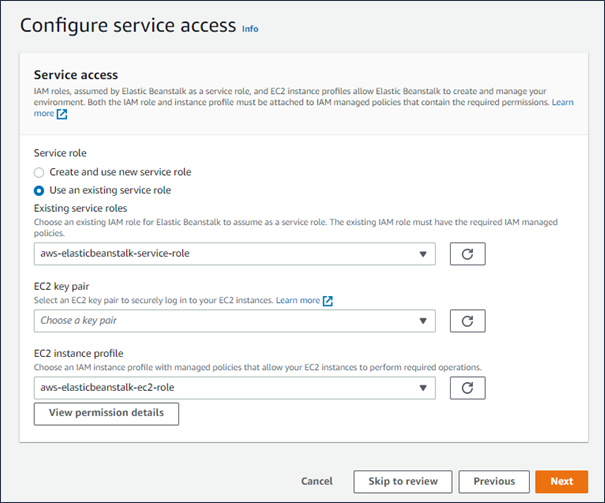
🟢Use an existing service rolemeans the IAM Role which is already present with all mandatory permissions. If there is now existing role then you can chooseCreate and use new service roleoptions, it will create new role with all mandatory permissions.
🔴ChooseEC2 key pairIf you wanna SSh into instance in the future. its not mandatory.
🟢EC2 Instance Profilemeans a role with use case EC2 and which have all the mandatory permissions. choose existing/default role , in case there is no any existing/default role. you can create role by following demo which is at the last of this blog.⬇️
That`s it, for Sample Application purpose these things are enough. now just click onSkip and reviewbutton at the last of the page. after clicking on button, you will be redirected to the following page review all the things and click onSubmit buttonat the last of the page.
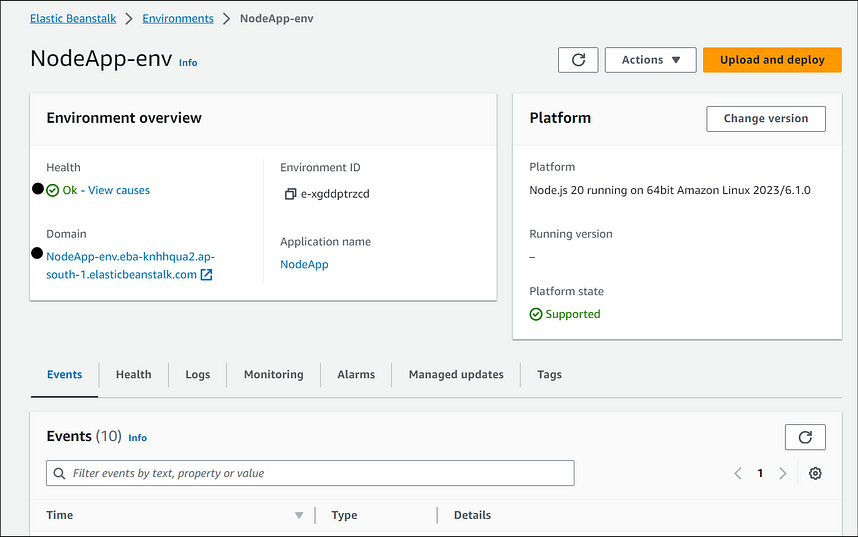
✋Wait for 3–4 minutes. after 3–4 minutes you will seeOk health statusanddomain nameof our application. now click on thedomain name.
→ After click on domain name you will see following our application page in the browser.Congrats🎉 you have deployed Sample NodeJS application with AWS Elastic Beanstalk.
🧹Cleaning Up
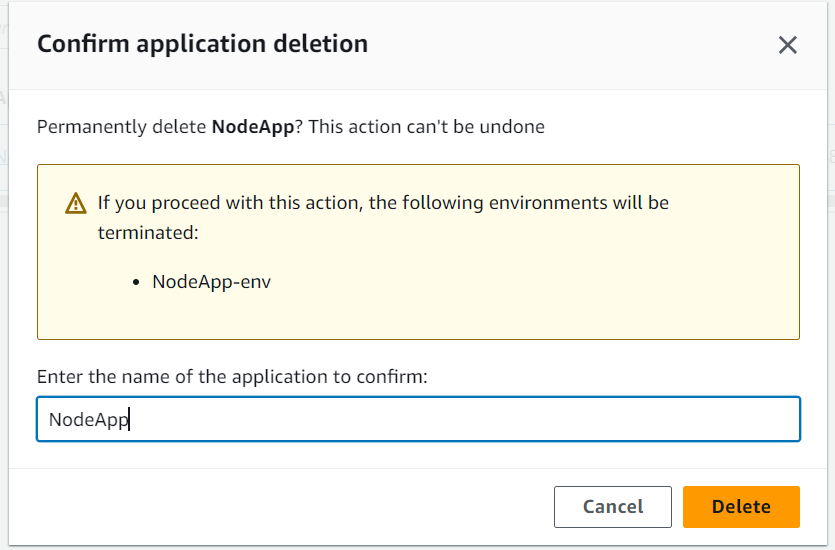
Go toAWS Elastic Beanstalk Console→: Click onApplicationfrom left side menu →: Select our Application by checking box → Click onActionmenu → Click onDelete Application→ you can see following box → type our app name → Click onDelete
❔Elastic Beanstalk FAQs
1. Who should use AWS Elastic Beanstalk?
Those who want to deploy and manage their applications within minutes in the AWS Cloud.
2. Which Operating Systems Does AWS Elastic Beanstalk Use?
AWS Elastic Beanstalk runs on the Amazon Linux AMI and the Windows Server AMI.
3. What Kinds Of Applications Are Supported By Aws Elastic Beanstalk?
AWS Elastic Beanstalk supports Java, .NET, PHP, Node.js, Python, Ruby, Go, and Docker, and it is best for web applications. and non-web applications can also be deployed using Elastic Beanstalk.
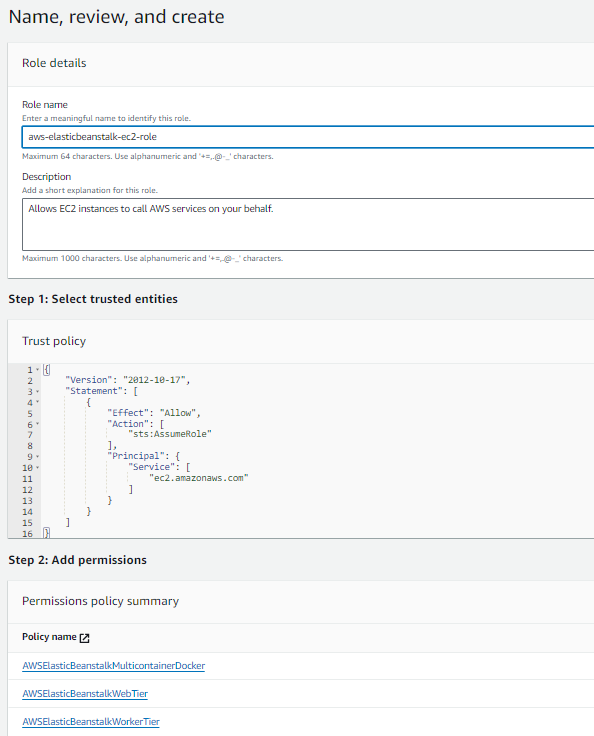
📌Create IAM Role For EC2 Instance Profile
→ To create an IAM Role for EC2 instance profile selection
Go to IAM console
In the IAM console navigation pane, choose Roles.
Choose Create role.
Under Trusted entity type, choose AWS service.
Under Use case, choose EC2.
Choose Next.
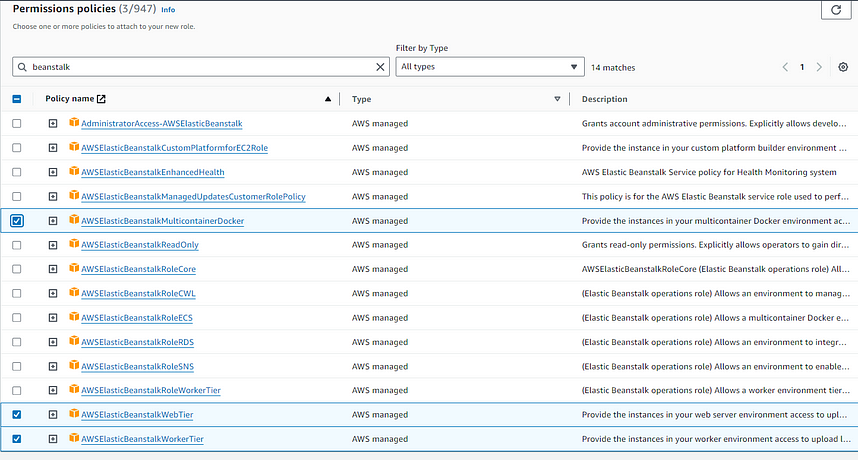
Attach the appropriate managed policies. Scroll in the View instance profile permissions modal window to see the managed policies. The policies are also listed here:
How To Follow The Steps T o Input Data Into An RDS Database? Author: Ujwal Pachghare To insert data into our MySQL Database which is running on Amazon RDS Instance we have to launch EC2 client. To create and configure an Amazon EC2 client to populate your source database follow these steps 👉On the EC2 Dashboard , choose Launch instance . 👉 On the Launch an Instance page, enter the following values: In the Name and tags section, enter DMSClient for Name . In the Application and OS Images (Amazon Machine Image) section, leave the settings as they are. 3. In the Instance Type section, choose t2.micro . 4. In the Key pair (login) section, choose Create a new key pair or choose an existing one . On the Create key pair page, enter the following: Key pair name : DMSKeyPair Key pair type : Leave as RSA . Private key file format : Choose pem for...
Deploy Super-Mario on Docker with Docker Compose by using Inspection Technique. Create light Docker image from heavy Docker image. Author: Ujwal Pachghare🌟 🚀 PREREQUISITES AWS Account Docker Hub Account Docker Installed Docker Compose Installed Dive Installed Trivy Installed First, we need to install some necessary tools. Open your terminal and run the following commands: sudo apt update && apt install jq - y This will update your package lists. 🐋 Installing Docker and Docker compose This script will download both Docker and Docker Compose. sudo curl -fsSL https://get.docker.com -o get-docker.sh ./get-docker.sh 🌊 Installing Dive A tool for exploring a docker image, layer contents, and discovering ways to shrink the size of your Docker/OCI image To install Dive, run the following commands: export DIVE_VERSION=$(curl -sL "https://api.github.com/repos/wagoodman/dive/releases/latest" | grep '"tag_name":' | sed -E 's/.*"v([^"]+)...
Dockerizing Application On AWS: A Practical Guide to Real-Time Implementation Author: Piyush Lokhande(Senior DevOps Engineer) Key Interview Inquiry : Q: “There is one application we want to deploy on AWS. Could you explain the steps on how to do that briefly?” Docker is a platform designed to make it easier to create, deploy, and run applications using containers. Containers allow a developer to package up an application with all the parts it needs, such as libraries and other dependencies, and ship it all out as one package. Step 1 : First create an Ec2 instance with a configuration with as per your organization’s requirement (AMI, SG, Key, VPC, Volume, etc) Step2: Finally create your instance. Step 3: Connect your instance with the cmd/putty terminal. successfully connected with cmd. Step 4: Run the below commands on below terminal for installation of the docker. sudo yum update - y sudo yum install docker - y sudo service docker start sudo usermod - aG docker...


Comments
Post a Comment